Difference between revisions of "3D Laserscanning"
(Created page with "Category:Measuring, Calibration{{Knoppen}} <noinclude><!------------------------------------------------ * READ THIS FIRST * Only edit this page if you can improve the cont...") |
|||
| Line 7: | Line 7: | ||
* Please start editing this page after the /noinclude | * Please start editing this page after the /noinclude | ||
* -------------------------------------------------></noinclude> | * -------------------------------------------------></noinclude> | ||
[[File:3d LaserScanning.jpg|thumb|right|3D Laserscanning]] | |||
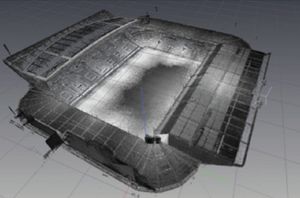
'''3D Laserscanning''' create a 3D image through the triangulation mechanism .A laser dot or line is projected onto an object from a hand-held device and a sensor measures the distance to the surface. Data is collected in relation to an internal coordinate system and therefore to collect data where the scanner is in motion the position of the scanner must be determined. The position can be determined by the scanner using reference features on the surface being scanned or by using an external tracking method. External tracking often takes the form of a laser tracker with integrated camera or a photogrammetric solution using 3 or more cameras providing the complete Six degrees of freedom of the scanner. Both techniques tend to use infrared light-emitting diodes attached to the scanner which are seen by the camera(s) through filters providing resilience to ambient lighting. | |||
Data is collected by a computer and recorded as data points within Three-dimensional space, with processing this can be converted into a triangulated mesh and then a computer-aided design model, often as nonuniform rational B-spline surfaces. 3D Laserscanning can combine this data with passive, visible-light sensors—which capture surface textures and colors—to build a full 3D model. | |||
Latest revision as of 01:49, 4 January 2013
3D Laserscanning create a 3D image through the triangulation mechanism .A laser dot or line is projected onto an object from a hand-held device and a sensor measures the distance to the surface. Data is collected in relation to an internal coordinate system and therefore to collect data where the scanner is in motion the position of the scanner must be determined. The position can be determined by the scanner using reference features on the surface being scanned or by using an external tracking method. External tracking often takes the form of a laser tracker with integrated camera or a photogrammetric solution using 3 or more cameras providing the complete Six degrees of freedom of the scanner. Both techniques tend to use infrared light-emitting diodes attached to the scanner which are seen by the camera(s) through filters providing resilience to ambient lighting. Data is collected by a computer and recorded as data points within Three-dimensional space, with processing this can be converted into a triangulated mesh and then a computer-aided design model, often as nonuniform rational B-spline surfaces. 3D Laserscanning can combine this data with passive, visible-light sensors—which capture surface textures and colors—to build a full 3D model.
