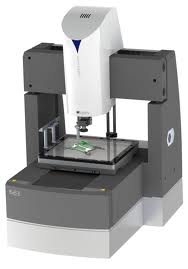
Optical Measuring Machines
Optical Measuring Machine, when clearly understood and applied, can bring huge benefits. It can also be an investment disaster. To avoid the latter, we need to start with an understanding of the basics--the capabilities and limitations of optical measurement. Then, we can consider the applications where it might provide a better solution over current methods, such as touch probes, optical comparators, hand gauges, or microscopes. Digging deeper, we can discover the challenges that those applications present to optical measurement, the limitations, and the potentials for failure.
Advantages
The significant difference between optical measurement and touch-probe measurement is that the touch-probe method finds the edges of parts by calculating the intersection of planes and other features based on a few points. Optics can find the edges directly. Touch-probe systems are limited in their analysis by the amount of points that they gather. Further, each point eats away at precious measurement cycle time because each measurement requires that the probe approach, contact, withdraw, and reposition. Optics can gather hundreds of points with each snapshot. Any feature that can be measured optically can be measured faster and more accurately due to the amount of information quickly gathered. Programming time for machine positioning is also shortened.
The advantages of optical measurement over optical comparators, hand gauges, microscopes, and other operator- dependent methods seem obvious. An automated system, properly applied, can gain control of cycle time, provide the data for statistical analysis and real-time control, and eliminate operator influence on the data. The key word here is automated.
Disadvantages
Obviously, there are certain feature characteristics that optics cannot measure. Cylindricality and tapers in bores cannot be measured optically. Perpendicularity of vertical faces to horizontal faces cannot be measured without additional costs of rotary axes or right-angle optics. Thus, the advent and prominence of the multisensor coordinate measuring machine . One disadvantage of automated optical measurement, or coordinate measuring machine measurement in general, vs. manual methods can be cycle time. If only a few dimensions are required, it may be faster to simply take them manually. Automated measurements take some setup time for part alignment before any measurement can occur. This can often be overcome with creative programming or multipart fixturing.
