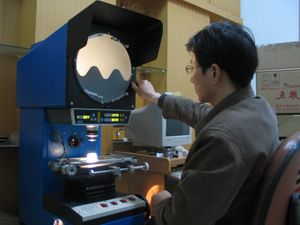
Profile Projector
Profile Projector often simply called a optical comparator is a device that applies the principles of optics to the inspection of manufactured parts.In a comparator, the magnified silhouette of a part is projected upon the screen, and the dimensions and geometry of the part are measured against prescribed limits.The idea of using profile projector, which is created by James Hartness and Russell W. Porter, came from mixing optics and measurement in a device. The use of the term comparator for metrological equipment, had existed in other forms prior to Hartness's work; but they had remained in realms of pure science and highly specialized applied science.
Profile projector also known as a shadow graph, and it is useful item in a small parts machine shop or production line for the quality control inspection team. The projector magnifies the profile of the specimen, and displays this on the built-in projection screen. On this screen there is typically a grid that can be rotated 360 degrees so the X-Y axis of the screen can be aligned with a straight edge of the machined part to examine or measure. This projection screen displays the profile of the specimen and is magnified for better ease of calculating linear measurements. An edge of the specimen to examine may be lined up with the grid on the screen. From there, simple measurements may be taken for distances to other points. This is being done on a magnified profile of the specimen. It can be simpler as well as reduce errors by measuring on the magnified projection screen of a profile projector.
The typical method for lighting is by diascopic illumination, which is lighting from behind. This type of lighting is also called transmitted illumination when the specimen is translucent and light can pass through it. If the specimen is opaque, then the light will not go through it, but will form a profile of the specimen. Measuring of the sample can be done on the projection screen. A profile projector may also have episcopic illumination which is light shining from above. This useful in displaying bores or internal areas that may need to be measured.
Applications
- Hartness's comparator, intended for the routine inspection of machined parts, was a natural next step in the era during which applied science became widely integrated into industrial production.
- It’s also employed for inspecting and comparing very small and complex parts, which play very significant role in system’s structure, as an application of quality.
Advantages
- Profile Projector can reveal imperfections such as burrs, scratches, indentations or undesirable chamfers which both micrometers or calipers can’t reveal.
- They’re able to measure in 2-D space. Unlike micrometers and Calipers, which measure one dimension at a time, where comparators measure length and width simultaneously.
- Optical comparators save time. Ease-of-use factors and ergonomic designs reduce the inspection time, retraining costs and operator fatigue, all while increasing throughput.
- Custom hard gages are subject to wear and need frequent recertification, which takes them out of service and adds an additional cost.
- Dimensioning techniques designed to give more leeway to parts in relation to their true functional purpose, such as profile tolerancing and true-position tolerancing with bonuses, reduce the reject rate of good parts that might have passed had their tolerances been assigned differently.
Disadvantage
- The limitation of using profile projector as a fixed device forms a disadvantage of it, while instruments such micrometer or calipers can be used to reach for measuring far and joint accessible components and it is large and bulky and usually require a cart to transport from place to place, also the device requires power for operation.

